I was featured here!

They are talking about me at CraftGossip.com

Wednesday 14 September 2011

Tutorial: Recycled Kitchen Cupboard Organizer


When I first created my kitchen cupboard stacker, I thought I'd never seen anything so beautiful in a long time. Call me crazy but this autumn with the grey winds and cold rains, I've been finding my ray of sunshine every time I open my kitchen cupboard. Stacks upon stacks of neatly lined culinary condiments -- each and every jar, bottle and sauce clearly visible and accessible. No more rummaging around and taking down all the bottles to reach for the stock cubes hiding away at the back. No more bending down-picking up-carrying over-and-stepping-up on the step-stool to reach for the peppercorns jammed behind bottles of ketchup and peri peri sauce. Mmmm bliss ... :)

So I thought, why not make a simple tute out of it and share the happy times? You'll need this stuff and only 20 minutes of your time to get your cupboard in spanking order:
  • Empty plastic milk bottles, juice boxes and/or empty kitchen/toilet paper rolls
  • A piece of stiff cardboard (I just rip apart old parcel delivery boxes and they work like a charm)
  • A retractable cutter
  • Hot glue gun
  • Measuring tape
  • (Optional) Spirit level gauge or half a glass of water in a clear glass
Right then. Now that your supplies are in place, go ahead and empty your kitchen cupboard and give it a good clean inside (start with a blank canvas eh?)

Now take your measuring tape and measure the width of the cupboard shelf that you want to organize. To make the tiers, here's how will calculate the width, length and number of cardboard strips you need:

Strip length:

You want to cut strips of cardboard as long as the width of your cupboard. (My cupboard is about 14 inches across so that's how long my cardboard pieces are)

Strip width:

To determine the width of each cardboard strip, look to the the fattest jar/bottle that you have in your cupboard. In my cupboard, for instance, the fattest jar is Hellman's mayo (see photo above). So in short, my cardboard strip is wide enough to accommodate a Hellman's mayo bottle.

Number of cardboard strips needed:

This will be (the number of times your fattest bottle will sit inside the cupboard) minus 1.

So for my cupboard, I took the jar of Hellman's and placed it inside the cupboard; I counted that only 3 bottles of the mayo would sit front to back in a single row.

So the number of cardboard strips I need is is 3 -1 = 2 cardboard strips.

Now for the thrifty, salvage-y, crafty bit **grin**.

I took the tallest bottle in my cupboard and held it up to where I wanted it sitting inside the cupboard. I held a ruler next to it in my other hand and eyeballed the height of my first tier; it had to be about 4 inches tall. For the second tier, I simply opted to halve the height of the taller tier i.e. 2 inches.

(If you need to build more than two tiers, it is best to build one tier, fill it up and then hold the tallest bottle in the next-down tier to eyeball the next tier's height.)

I'll show you how I made the shorter tier here. I simply took three empty plastic milk bottles and washed them out. I measured 2 inches up from the base and marked it all around. Then I made a slit using a retractable cutter at that mark and cut all around the bottle using a pair of scissors. Here's how the cut-up bottles looked (ignore the mess in the background, I was having a messy day :P)

So each of these little cut-up bottoms is 2 inches tall. Next, I simply placed the three bottle bottoms along the length of one cardboard strip and traced their outlines roughly...


I hot-glued each of the bottle bottoms inside their outlines to create a wonky little tier, see?


(If you're feeling extra DIY-ish, you could place a spirit level gauge or a half-glass of water on top of the tier before gluing anything, just to make sure it is horizontal. If it is too topsy, just change the positions of the plastic bottoms or slice off thin slivers of plastic until your tier is level. I did it and do not regret it; its not perfect but nothing will fall off it, see?)


And there you have it, one tier all done! Can you see all the recycled bits and bobs I used to create the tiers for my cupboard?


When assembled, put the tiers in your empty cupboard and see how they're doing. If all seems okay, pull out your hot glue gun and connect the tiers together at all the places where two tiers touch each other. My tiers were touching each other where the orange juice box is, so I hot-glued 'em there.

It all looks a bit raw and wonky ... but all of that will disappear in one-two-three!

One ...

Two ...


Three!


Voila! That's kitchen cupboard perfection for me. Now all I need to do is change the label on my chilli flakes jar. Boo. Another time.

Go on and give this a go ... let me know how your projects turn out! Toodles!

Sunday 28 August 2011

Yayyy! I got published on Craft Gossip!!


So the best thing about today's craft morning for me: I got published on CraftGossip.com!! (As if that gigantic post-it I've placed beneath the header isn't enough, hehehe!)

But I'm so thrilled, it's making me sing.... :D

Check out the link to my page here!!

Meanwhile, I'm doing my special I-got-published dance, jiggly bits n all ... hehehehe!!

Toodles!

xxx

Mimi

Thursday 25 August 2011

Follow-up: Today's Crafting Project

It worked, yayyyy!!! I managed to turn part of our ugly old curtain into a fully functional 9-pocket shoe organiser!!! (9 pockets? Are DH and I missing a foot between the two of us? Nawwwh. But that was all the space I had ... hehehee!)

The good news: it was pretty easy for me to put together .... which means it must be REAlly easy for all you who know how to sew already.

We managed to hammer the nails in place to hang the organiser inside the cloaks cupboard and it stores shoes like a dream! (It's still that awful ugly-curtain print but at least now we can appreciate its functionality rather than hate the print :P)

So I've decided to make an identical organiser and hang it inside the other door of the cupboard so we can have lots of efficiently utilised space. (More room for winter boots in the cupboard as well before the chills approach in a coupla months.)

Tutorial coming soon!

xxx
Mimi

Tuesday 23 August 2011

Today's Crafting Project

So it was about time I finally took the plunge and made a shoe organiser for our coat cupboard. There's a huge mess in there ... and our tiny shoe rack is of little use. And no matter how badly you want to, you will never see the inside of that cupboard in my lifetime (unless I spruce it up and get it to look all neat and pretty .... **mental note to add to my future projects list**)

I've been working on a homemade hanging shoe organiser all day today. Couple the long hours with my almost-next-to-nothing sewing skills and a very pregnant belly, it's not been the easiest of rides. Grrrr .... :-X

Butttttt .... today's motto is just stay calm and sew. I'm nearly there, it's almost over.

And even though I've recycled an ugly old curtain to create my organiser, if it turns out successfully (fingers crossed!!) I'll post a tutorial up here soon.

Watch this space and wish me luck!!

xoxox

Monday 22 August 2011

Tutorial - Quick and Easy Recycled-Yoghurt-Pot Ribbon Organizer

This little cutie had been sitting on my "to-do" list for the longest time...


Really I should be ashamed because it is so quick and easy, I don't have any excuses to not have made it any earlier.

I had a bunch of narrow craft ribbons lying around in an untidy heap in my drawer...


... And I really needed to take care of it. So I ended up making this handy dandy ribbon organiser. You only need a handful of things for this project and it shouldn't take you more than 30 minutes (10 minutes for the crafty ones) to finish it up!

Here are the main things you'll need:
  • An empty plastic yoghurt container (or custard/cream pot) with original lid
  • Gift wrapping paper
  • PVA glue (or that thing they call mod-podge)
  • A retractable cutter
  • An untidy pile of ribbons just itching to be sorted!
Right, let's get going.

First things first, I washed out and dried the yoghurt pot and lid ...


Next, I cut up a piece of cute gift-wrap (I liked this silly one with all the faces on it) and pasted it onto the pot using PVA glue. Set it to one side to dry while you carry on ...


I took the lid and placed it top-down on a blank piece of paper. I traced the outline in pencil...


Now for that pile of ribbons ...


They were all the same width; I measured one and it was about 10 mm wide, see?


This gave me an idea of the size of slots I needed for my ribbons. Back to that circle outlined on the paper, I drew a series of roughly 10 mm long lines inside the circle. I did this in a concentric fashion; you could draw them wherever you want inside the circle ...


Next, I took the yoghurt pot lid and placed it bottom-up on the circular design. Holding it firmly in place, I made slits on the lid along the pencil lines using a retractable cutter. (Make sure the slits are fairly straight and around 1mm longer than the actual ribbon width...)

Right, time to take care of those ribbons. I bundled up each ribbon and placed it inside the pot...

Next, using a small blunt object (I used the plastic end of a tic-tac pencil) I pushed one each of each ribbon through a slot in the lid...


And I pulled it through on top. Do this with all the ribbons...


Once all the ribbons are pushed through, place the lid back on the pot.

Ta-daaaaa !! You have a bunch of happy ribbons living together in their cute little organizer. Every time I need a ribbon, I can look at the exact shade I need. I can also see when a colour is running out through the transparent lid when I start pulling it through ...so now I can top them up easily.


This organizer is so quick, easy and cheap, you could make one for each specific bundle width of ribbons e.g. a pot for 6mm ribbons, 10mm, 20mm and so on ...

You could also have pots according to families of colours and arrange them in your collection. Do let me know how your projects turn out; happy crafting! xxx

Saturday 13 August 2011

Tutorial: Two-tiered Recycled Shoebox Sewing Kit

So it was about time I did something about all the mess with my sewing supplies. I'd read in several places about reusing an old shoebox to create a sewing kit but I couldn't find a step-by-step tutorial anywhere. I decided to take the plunge and make a tutorial out of it as well. I also took it a stretch further and recycled a collection of smaller household containers to organize my sewing equipment.

I ended up making a handy two-tiered sewing box that fulfills most of my storage needs. Here is the finished product:


The main things I used for this project were:
  • An old shoe box
  • Some decorative paper (I used some wallpaper from a leftover roll and scraps of gift-wrap paper)
  • Food/drink/etc boxes e.g. juice box, cookie trays, fruit containers. I'll talk about these as we go along...
Right so those are the main things I used. Let's get started!

Here's the shoebox I used. It's pretty basic ...

I wanted to make a hinged-lid sewing kit. To do this, I sliced the box in two adjacent corners along one length using a retractable cutter ...
Here's how it looks after being cut.
To allow the hinge to slide inside the box, I shaved off some slivers of cardboard on either side of the cut edge like so ...
Next, I prettied up the box and the lid using paper from an old wallpaper roll. I used watered-down PVA glue and used the technique outlined in this video to cover the box and the lid. (Thanks monkeysee!)

I found a lonely old button lying around and hot-glued that to the lid to make it feel like a sewing kit lol !
Next, I pasted a piece of gift-wrap paper to cover the inner base of the box. I also hot-glued the cut-edge of the lid to the inside of the box, creating a hinged lid (yellow arrow). See?
Now that the outer shell of the kit is ready, time to work on the inside. I used a handful of different boxes salvaged from the kitchen and around the house to create the inner compartments. Let me show you how to make one box and you can pretty much apply the same technique to any box you find suitable.

Here's a rinsed-out orange juice box. I sliced off the top using a sharp knife...
Next, I opened up the four sides of the box by cutting down the four corners, down to the point of the height of the box.
I trimmed off the four sides around 1-and-3/4th the height of the box. Pretty simple, see?
Next I just folded in the extra cardboard and hot-glued it to the inside. Here's the finished box. Ta-daaa!
So I ended up make three such boxes. I covered up the base of each box with pieces of gift-wrap paper ...

A little tip here: try to keep the boxes roughly about the same height to make it easier to organize the insides.

Right. The sewing kit has two levels. To make the upper level, I took a piece of cardboard and trimmed it down to slightly smaller than the actual shoebox.

Next, I prettied it up by covering it with gift-wrap paper. I also cut out a small rectangle on one side of the cardboard to make it easier to lift out.
Next, I played around a bit with the different boxes and settled upon two boxes that I wanted on the upper level. I hot-glued these to the cardboard tray. Check them out; can you spot a re-used cookie tray in there?
All done! Here's the finished sewing kit. Let me show you how it's working for me ...

The upper tray lifts out easily, see?
And here are the contents of the top compartment. I pasted strips of magnetic tape in one cookie compartment to keep all the pins in one place.
And here's the bottom compartment. See the cherry-box compartment on the left? Works perfectly! :-)
So now all my sewing supplies are neatly in one place...
I'll be making a thread/bobbin sorter next to keep my threads tidy. Watch this blog for more tutes. Thanks for looking and let me know how your projects turn out! xxx

Monday 8 August 2011

Tutorial: No-sew Fabric Mail Organizer


My main goal in this project was to create something useful out of nothing. So literally, I spent no money on this project. I already had my craft supplies and for the materials, I decided to use up the fabric from two old throw-away pyjama bottoms and an old cardboard box.

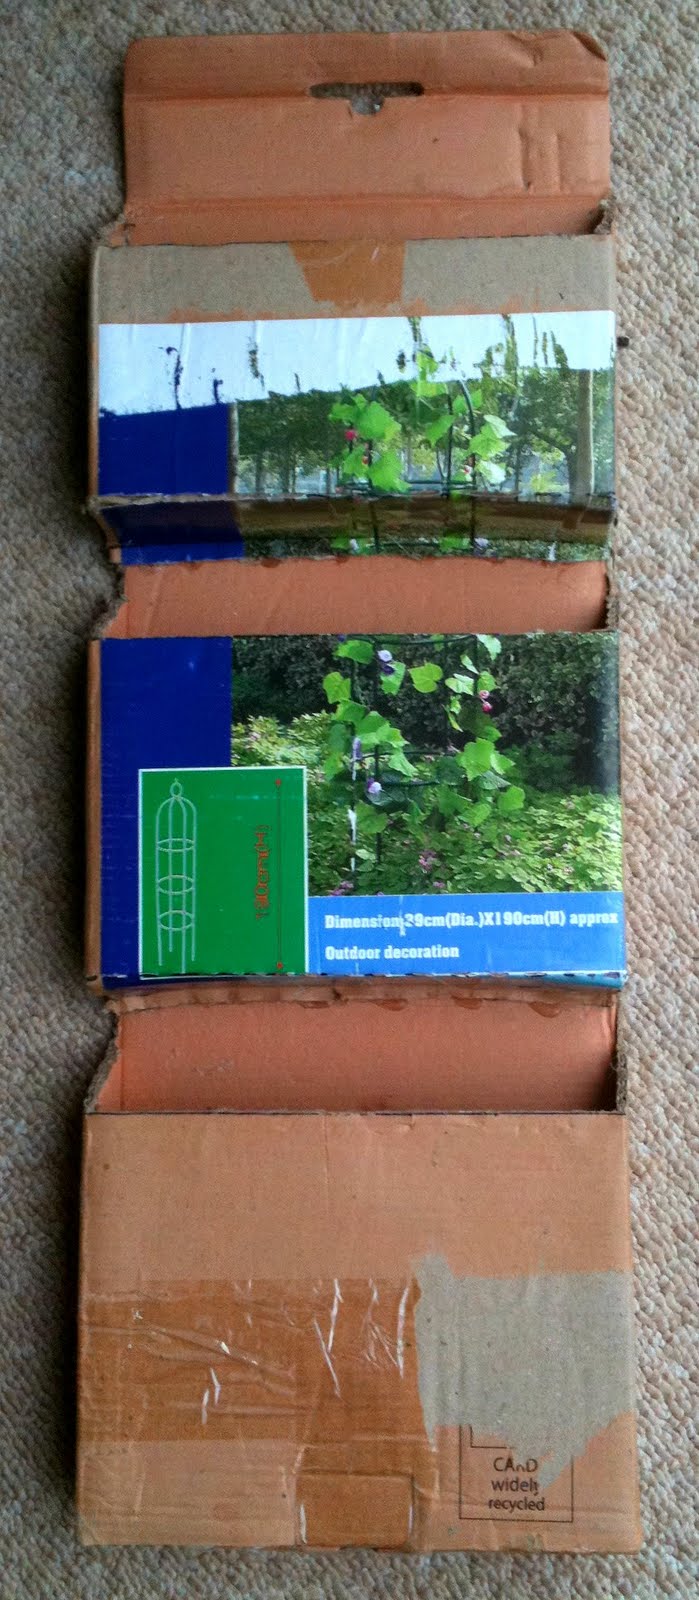
Here's the box I used; it originally contained a flat-pack garden obelisk. You could use any long flat cardboard box e.g. wall shelves packaging or a flat-pack furniture box.


I decided to make three main compartments out of it: "In", "Sorted" and "Bits n Bobs". Don't ask me why, we just don't have a lot of "Out" mail lying around so it made little sense to create an "out box". We are also always rummaging around for the odd pen/scissors/USB downstairs so a place to keep these bits handy made sense. Finally, where does the mail go after we've been through it? Temporarily in the "Sorted" compartment before being removed to make more room.

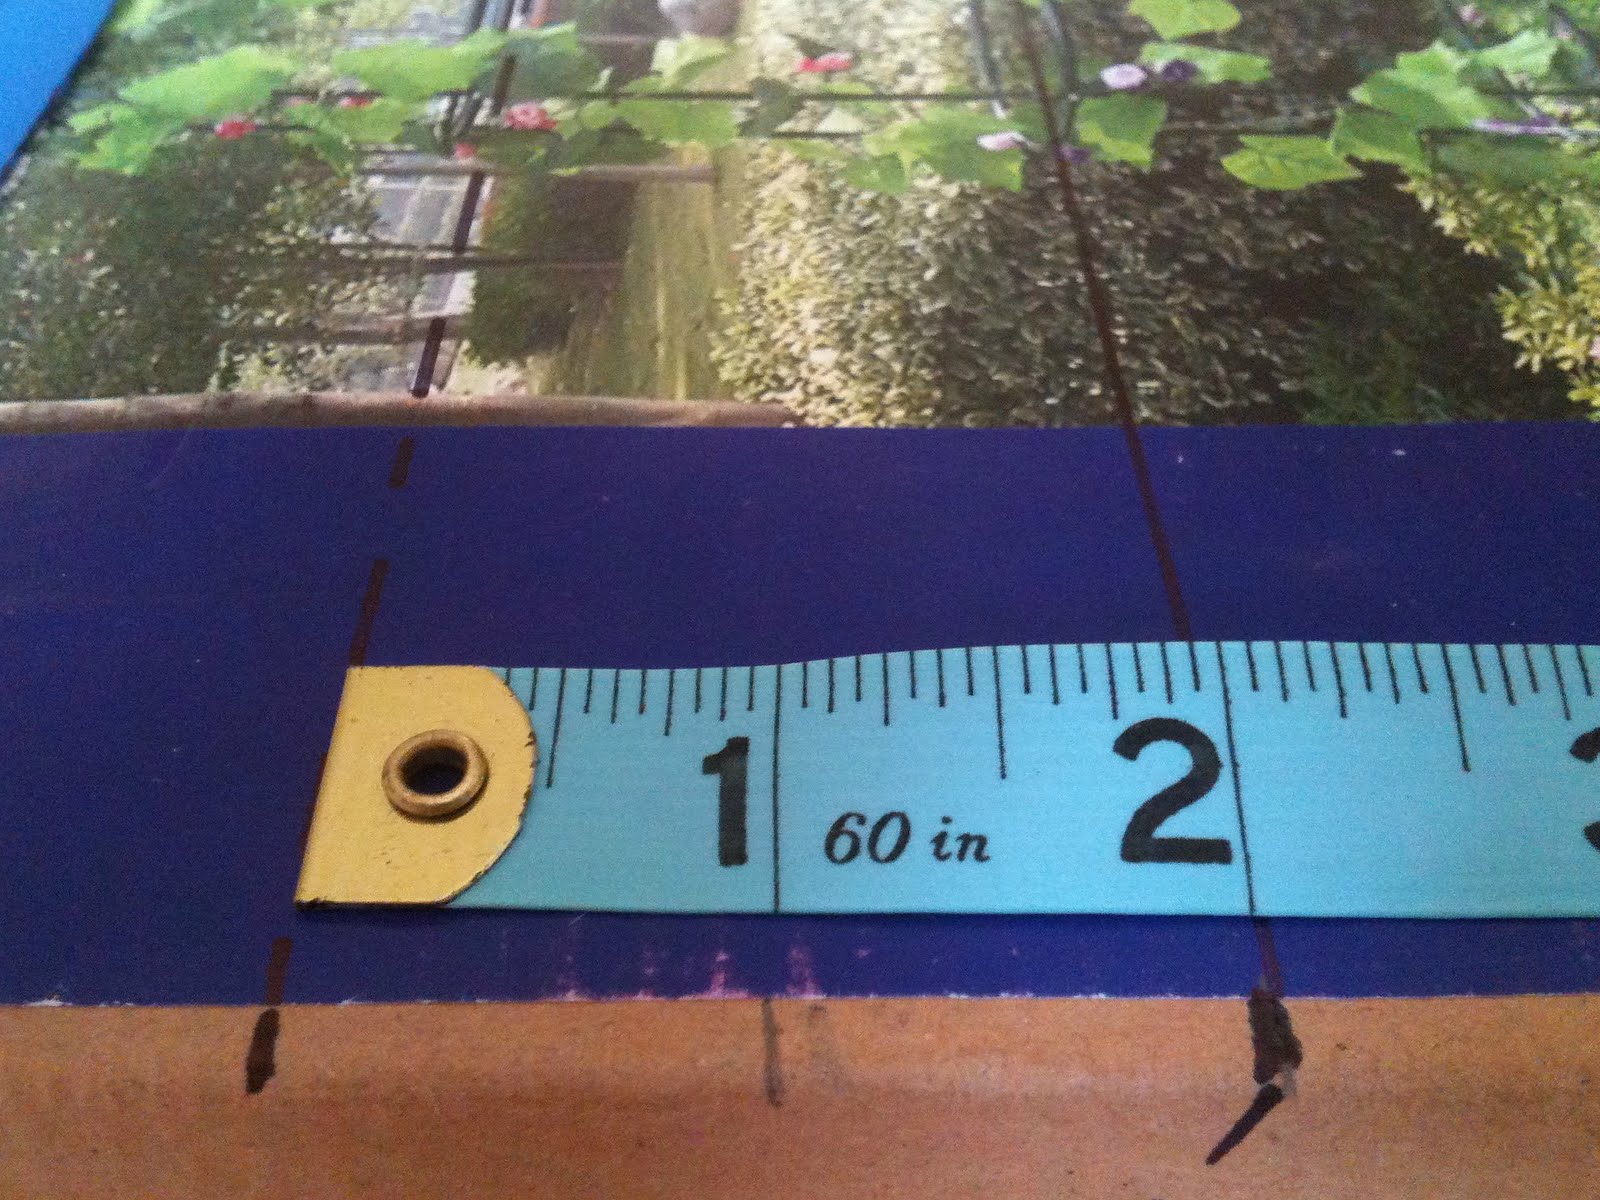
The lowest "In" compartment would be the largest; the top compartment would be smallest to keep the odd stationery items. Here's how I started measuring things out:

  • The bottom pocket would be 6 inches tall, the middle one 5 inches and the top one 4 inches tall.
  • Each pocket would be 1 inch taller at the back so e.g. a 6 inch tall pocket is actually 7 inches at the back, allowing me to make that slanty edge down the sides.


So in the image above, you can see the bottom-most pocket. It is 7 inches at the back and approx. 6 inches at the front. I drew a line straight across the front to mark the pocket line. I also drew a line connecting the front of the pocket to the back of the pocket (which is the slanty line you can see on the left of the image).

Right. So I continued the same way further up the box. Here's where I had to use a little logic because I was, after all, dealing with stiff cardboard that needed to be cut/bent and fixed into place.


The dotted lines (yellow arrow) were the fold lines. I simply poked slits along the dotted lines using a retractable cutter to make it easier to fold the cardboard. The solid line (orange arrow) is where I actually sliced along to make the opening of the bottom pocket. A little tip here: using a sawing motion really helps make long smooth cuts.

Right. So it all looks a little confusing at the moment but once I started folding along the dotted lines, the organizer began to take shape.


As you can see above, I folded that little sliver of cardboard back onto itself because under that's where the adhesive would go. And after tucking in the side lapels and the base, here's what it looked like. You can clearly see the bottom pocket's shape now.


Once one pocket had been cut out, the base of the next-up pocket naturally took shape. Now all I had to do was repeat the same thing for the pocket above. This time I left a height allowance of 5 inches at the front and 6 inches at the back of the pocket. Let me see if I can explain this with a photograph:


So you see the front of the pocket is 5 inches tall and the back is 6 inches tall, again allowing me to make those slanty sides (dotted line on the left).

I also want to point out that I left a space of 2 inches between the pockets to allow easy access, as you can see below:


Okay, again some more cutting and folding and here's what took shape:


Finally, for the top-most pocket which is 4 inches tall, you can see the lines I cut along below:


So after all the cutting and folding, here's what I was left behind with; you can clearly see the main skeleton of the mail organizer now...


Right. Time for some hot glue gun magic! I basically glued everything that folded and bended and then I reinforced the base of the pockets further by putting masking tape across the bottoms.

Here's the organizer after being glued in place. I forgot to take a photo of the taped product...


Now then, time to cover it all up. I did not have any fabric lying around the house; I did however, have a bag full of old clothes that I was planning to send away to recycling. I thought two of my jammies complemented each other beautifully: a red chequered one and a black jersey one.

I cut one leg off of each of these and then cut vertically along the stitch line which gave me a longish piece of fabric to work with. I pressed it out with a hot iron to give me a smooth finish. I'd read somewhere that if you want to achieve sharp crisp lines in fabric, it is better to glue the fabric onto a backing paper and then attach that backing paper to the project.

Here's where I took out my protractor, compass and ruler and drew out the shapes of the pockets on pieces of plain brown paper (I'd salvaged and smoothed out the paper from a parcel's packaging.) You could use any piece of paper that will accommodate the design of the pocket flat out. A tip here: it is better to trace out a slightly generous paper pattern than the actual size (by about 3mm all around) to allow for any mistakes.

When asked, my DH suggested "more black" instead of red in the organizer lol! :o) So I decided to make two black pockets (top and bottom) and one red chequered pocket (the middle one). Here's how the paper patterns looked layed flat out on the back of the black jersey bottoms fabric.


Now to adhere the fabric to the paper, I only had regular old PVA glue. I diluted it down by adding around 2 tablespoons of tap water. I applied the glue to the paper, completely covering one side...

Now to adhere the paper to the fabric took a little bit of delicacy. If you're doing it this way, you would need four hands. I asked DH to hold the gluey paper (sticky side down) at either end and then I asked him to carefully lower it down onto the fabric in a U-shape with the middle of the paper touching the fabric first. Now then, as soon as the paper touched the fabric, I started smoothing it out from the middle outwards. (I'm sure I'd read about this technique somewhere online as well; I'll post a credit to the link when I locate it.)

A couple of tips: 1. using the outer side of your hands and pinky fingers to even out the paper works. 2. Also, whatever happens, DO NOT stretch the fabric. If you have to fiddle, fiddle with the paper instead. (I learned this the hard way.) Even if you're as clumsy as I am, rest assured that by the time you get to the third pocket, you will still get a fairly decent finish out of things.

So anyway, once the paper was glued to the fabric, I cut all around it leaving approximately a 1/2 inch allowance. One down, two to go.

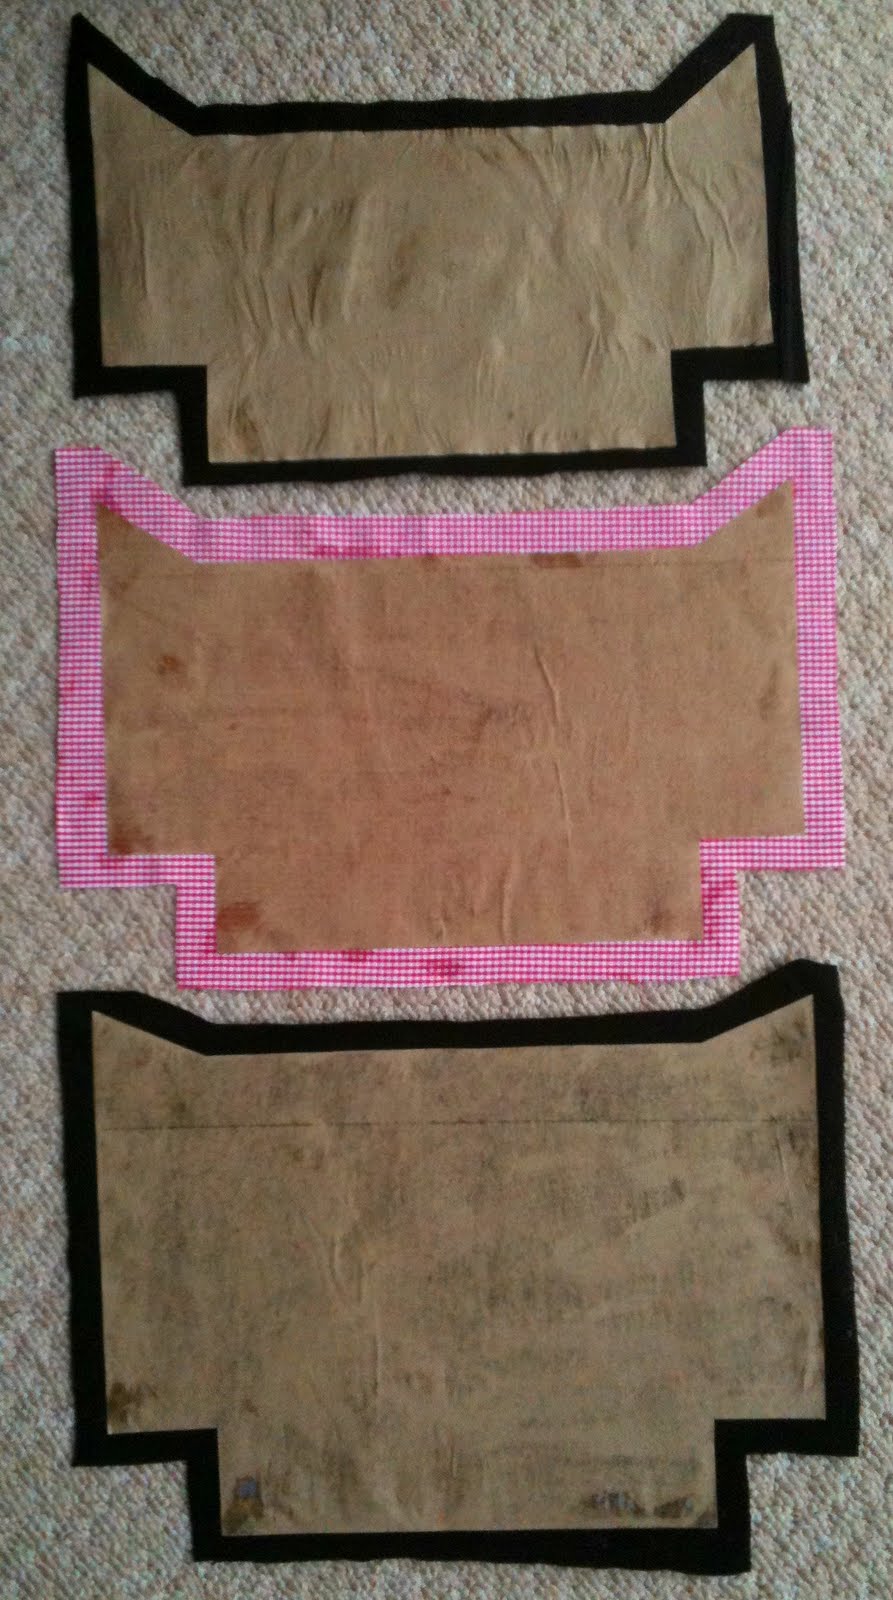
Here's what the three pieces looked like after all the cutting:


As you can see, the cuts aren't perfect but then again they don't have to be because the excess fabric will be tucked away out of sight.

Next, I took a tea break and let the glue dry out slightly. Now for those crisp lines, I folded the right, left and bottom lapels of each fabric cover back onto themselves and used a blunt object (the grips of a pair of scissors) to make a sharp crease.

Right then, time to glue the fabric onto the mail sorter! This time, I applied the watered-down glue directly on to the cardboard skeleton...


... and simply pressed the paper in place. I don't have a picture of the raw first draft but it still had all the loose edges that needed to be taken care of.

Another 30-minute drying-out break later, I fired up the hot glue gun and tucked in and hot-glued all the loose bits around the pocket openings and under and behind the pockets. Any ridiculous excesses of fabric/paper were clipped away.

Now then. The top lapel of the organizer (the original lid of the box) was all wrinkly and creased. To smooth this out, I traced out its shape and cut up another piece of cardboard and hot-glued it on; this ended up reinforcing the top lapel as well. Take a look:

Here's the cut-out shape of the top lapel:


Inside the top pocket, I added a smaller inner compartment for the odd pen/scissors/USB (otherwise they always fall in sideways and are very fiddly to lift out!). I did this by simply folding a small rectangle of flexible cardboard twice (yes, it's a piece from a frozen pizza box lol!). I taped it inside. (And yes, it's sad I only had electrical tape left to stick it in :P) But it worked! Take a look:


Right then: time for the trimmings. I wanted to put up contrasting strips of red across the black pockets. I also wanted to cover up any untidy fabric edges underneath the top two pockets. So I made three red fabric strips (two for the contrasting trimmings and one for the cover-up) and I made one black fabric strip (to cover up the bottom edge of the top pocket).

Now I don't know how to make bias tape. If you do, it's a major plus. But all I simply did was this:
  1. I made a long straight crease about 1/2 inch along the inside of one side of the fabric, pressing it down with a steam iron.
  2. Then I folded it in over once more, leaving a width of approximately 1 inch of fabric.
  3. I then opened both the creases and cut along the second crease, leaving a 1/2 inch allowance.
This gave me a long narrow smooth ribbon of fabric. Take a look:

Here's a close-up of the top two pockets. You can see the black and red ribbons securely hot-glued underneath the pockets, hiding away any frayed fabric edges.


Next, I hot glued the two red ribbons across the black pockets. The ends of the ribbons were tucked away and glued behind the organizer. Any excesses were trimmed. Here's the organizer at this stage:


Almost there. As an after-thought I wanted to do two more things: Add a trimming across the top (hanging) lapel and add some labels to the pockets.

Once again I folded and cut off a strip of the black fabric and hot-glued it across the top of the organizer. I left around 1/4 inch of extra ribbon on either end, tucked the ends under and hot-glued in place. This left no raw edges exposed.

For the fabric labels, I used the technique demonstrated in this Youtube video. Worked like a charm! (Thank you Crafty Gemini!) I left a 1/2 inch allowance all around the label, cut it out, folded and pressed in the edges and hot-glued the labels in place.


They're not perfect but I think they look cute enough :)

Finally, the moment of truth. Here's the finished product!

And here it is serving us in all its glory, lol !!

I'm really pleased with the end result. I've tacked it in two places on the wall- one on top and one above the bottom-pocket. This keeps it firmly in place and keeps it from swaying side-to-side.

What do you think? Thanks for looking and please let me know how your projects turn out!

xxx